Creating Forms > About lists and menus > Creating a scrolling list
Creating Forms > About lists and menus > Creating a scrolling list |
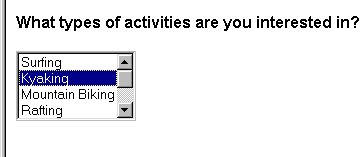
Scrolling lists allow you to set up multiple options in a confined space. You can set the line height of the list, and allow users to make multiple selections within the list.

To create a scrolling list:
| 1 | Place the insertion point inside the form outline, then do one of the following: |
| In the Objects panel's Forms category, click the Insert List/Menu icon. | |
| Choose Insert > Form Object > List/Menu and select the resulting List/Menu element if necessary. | |
| 2 | In the Property inspector's List/Menu field, type a unique name for the list. |
| 3 | Under Type, select List. |
| 4 | In the Height field, type a number to specify the number of lines the list will display. |
| The default line height is set to 4. Scroll bars appear when the number you specify is less than the number of options the list contains. | |
| 5 | If you want to allow users to select more than one option in the list, select Allow Multiple (next to Selections). |
| 6 | Click List Values to add the option choices. |
| The List Values dialog box appears. | |
| 7 | With the insertion point in the Item Label field, type the text you want to appear in the list. |
| 8 | In the Value field, type the text or data you want sent to the server when a user selects this item. |
| 9 | To add another item to the options list, click the Plus (+) button, then repeat steps 7 and 8. |
| 10 | When you finish adding items to the list, click OK to close the List Values dialog box. |
| The Property inspector appears. The option choices are visible in the Initially Selected field. | |
| 11 | Select one of the items on the list to make that item be selected when the list initially appears. |
![]()