Dreamweaver Tutorial > Use the Assets panel
Dreamweaver Tutorial > Use the Assets panel |
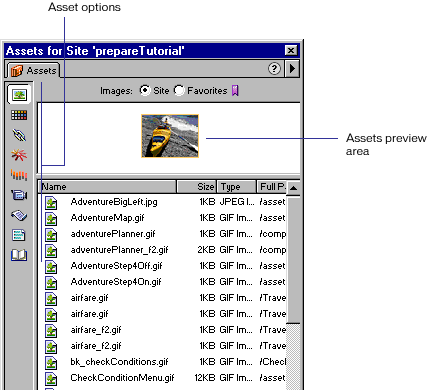
The Assets panel lets you view your site assets such as images, HTML colors, links, Flash movies, other types of movies, scripts, templates, and library items. You can view all your site assets in one place and then easily add content to your page directly from the panel.
Now you'll learn how to use the Assets panel to add assets to a page.
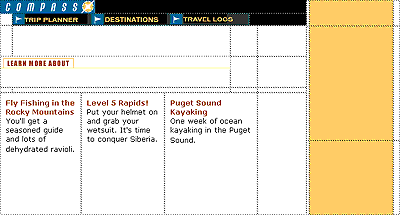
So you don't need to create additional tables in your home page, this tutorial includes an HTML file that is similar to the home page you created; it includes a new table cell on the right side of the document.
To start this part of the tutorial do one of the following:
| If you're continuing the tutorial from the previous section, choose File > Open then select DW4_CompassHome2.html. | |
| If you're starting the tutorial in this section, choose Site > Open Site, then in the Sites list select Tutorial - Dreamweaver to open a defined site. In the Document window's main menu choose File > Open; in the dialog box that appears, select DW4_CompassHome2.html. | |
The DW4_CompassHome2.html file opens.

|
Begin by opening the Assets panel.
| 1 | Open the Assets panel by doing one of the following: |
| Choose Window > Assets. | |
| Click the Show Asset icon in the Launcher Bar. | |
The Assets panel appears.

|
|
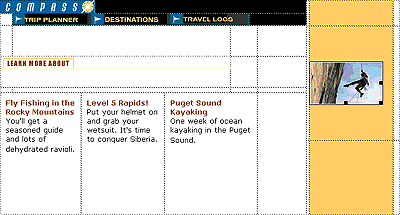
You'll start by using the Assets panel to insert two images in the page—a rock climber image and a text image.
| 1 | In the Assets panel, click the Images icon and make sure the Site radio button located at the top of the Assets panel is selected so you can view all of the images in the Compass site. |
| 2 | In the Names list, select the image icon for climber.jpg then drag it to the middle table cell in the right side of the page.

|
| 3 | Press the right arrow key (this deselects the climber image and places the insertion point after the image), then press Shift+Enter (Windows) or Shift+Return (Macintosh) to insert a line break. |
| 4 | In the Name list, select featureText.gif then drag it to the line break you just created placing the featureText image under the climber image. |
Now you'll add a different type of asset. You'll drag a Flash movie into the cell below the navigation buttons.
| 1 | Click the Flash icon in the Assets panel to view all the Flash files in the Compass site. |
| 2 | In the Names list, click welcome.swf to select the Flash movie you're inserting in the document. |
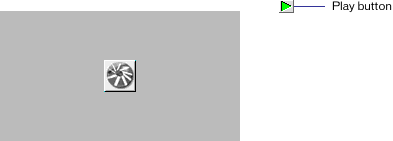
| In the Assets panel's preview area you see a placeholder for the Flash movie. | |
| 3 | Click the Play button in the Assets panel's preview area to view the Flash movie.

|
| 4 | In the Names list, drag the Welcome.swf to the cell below the Trip Planner navigation button. |
| A Flash move placeholder appears in the selected cell. | |
Apply a color using the Assets panel
Colors you apply to HTML elements, such as to text or as a background color, are automatically added to the color category of the Assets panel. You can select a color from the Assets panel and apply it to text in the same page or to other pages in your site.
| 1 | Place the insertion point after the rock climber image, then press Enter (Windows) or Return (Macintosh) to add a new paragraph, then type Yosemite. |
| 2 | Double-click Yosemite to select the text. |
| 3 | In the Assets panel, click the Colors icon to view HTML colors in the Compass site. |
| 4 | In the Value list, select the color icon for #993300 then drag it to the selected text to apply the color. |
Use the Assets panel to manage your assets. You can create your own group of favorites assets in the Assets panel. Next, you'll add the Compass logo and navigation button image to your site Favorites list.
| 1 | In the Assets panel, select the Images icon. |
| 2 | In the Name list, click compass_logo.gif to select it, then do one of the following: |
| Right-click (Windows) or Control-click (Macintosh) to use the context menu, then select Add to Favorites. | |
| Click the Add to Favorites icon located in the lower right of the Assets panel. | |
| You are alerted that the selected asset was added to your site's Favorites list. | |
| 3 | Click OK. |
Add multiple images to favorites
Now, you'll add the navigation button images to the favorites list. You can select multiple images in the Assets panel, then add them to your favorites at one time.
| 1 | In the Assets panel's Images list click the first navigation button image (MenuDestinations.gif). |
| 2 | Select the other navigation buttons by doing one of the following: |
| Press Shift (Windows) and in the Images list click MenuTripPlanner_on.gif (the last navigation button in the list) to select all of the navigation button images. | |
| Press Shift (Macintosh) and hold it while you select each of the navigation button images. | |
| 3 | Click the Add to Favorites icon. |
| 4 | Click OK to the alert message. |
You can view the assets you've added to your Favorites list, and use this view for inserting assets in your document.
| To view images you've added to the Favorites list, click the Favorites radio button at the top of the Assets panel. |
![]()