Dreamweaver Tutorial > Design a page in Layout view
Dreamweaver Tutorial > Design a page in Layout view |
You'll start your first page while working in Dreamweaver's Design view. You'll lay out the page then insert images and text.
The page you complete in this section of the tutorial will look similar to this page.
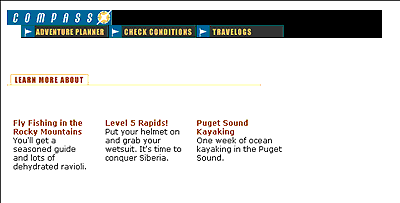
Dreamweaver has two visual design views—Standard view and Layout view. You'll start by working in Layout view, which allows you to draw layout cells or layout tables into which you can add content such as images, text, or other media.
In this part of the tutorial, you'll lay out the page; in the next section you'll add content. (Once you're comfortable with these two tasks, you may find it easier to add layout and content together.)
| 1 | In the Objects panel, click the Layout View icon if it isn't already selected.
|
| The Getting Started in Layout View dialog box appears and describes the Layout view options. | |
| 2 | Review the options, then click OK to close the dialog box. |
| 3 | In the Objects panel under Layout notice the Layout options—Draw Layout Cell and Draw Layout Table—are now available; these options aren't available in Standard view. |
In Layout view you can draw layout cells and layout tables to define the design areas of a document. This task is easier to accomplish if you prepare a sample of the page you're creating before you begin laying out a page.
Look at the following sample layout to get an idea of the page layout you're creating in this section of the tutorial. There's a cell for the Compass logo, a table with three cells for site navigation buttons, a cell for another graphic, and a table for three cells that will hold text.
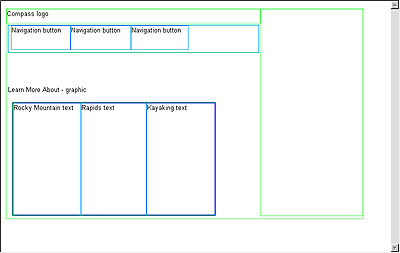
You'll draw tables and cells similar to this layout as you work in your document. First, you'll draw a layout cell in which you'll insert the Compass logo.
| 1 | Click in the Document window of the my_CompassHome document to make the document active. |
| 2 | If they aren't already open, open the following work area tools: |
| The Objects panel (choose Window > Objects), which you'll use to add objects to your document. | |
| The Property inspector (choose Window > Properties), which you'll use to set properties or attributes for objects in your document. If the Property inspector isn't already expanded, click the expander arrow in the lower right corner so you can see all the property options. | |
| 3 | In the Objects panel, click the Draw Layout Cell icon. |
| 4 | Move the pointer to the Document window; the mouse pointer changes to a drawing tool (looks like a small cross). Click in the upper left corner of the document, then drag to draw a layout cell. |
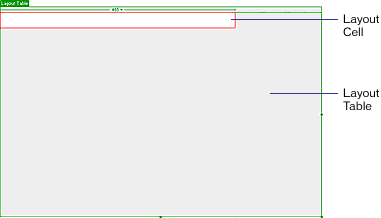
When you release the mouse, a layout cell appears in a layout table.
|
|
| The layout table expands to fill the Document window, and defines the page layout area. The white rectangle is the layout cell you drew. You can place additional layout cells in the gray area of the layout table. | |
To precisely design a page, you can set the size of cells you add in a document. You can also reposition cells in the page.
| 1 | Click the border of the layout cell to select it. |
Handles appear around a selected layout cell:

|
|
| 2 | To resize this layout cell, do one of the following: |
| In the Property inspector for the layout cell, type 510 in the Fixed field to set the cell's width to 510 pixels, then click in the document to see the cell width change. | |
| Note: If you enter a pixel width that is larger than the width of the layout table, or that causes the cell to overlap another cell in a layout table, Dreamweaver alerts you and adjusts the cell width to a valid width. | |
On the right side of the layout cell, drag the middle resize handle to the right until the cell is the desired width. When you release the mouse, the cell's width is displayed in the column header area along the top of the layout table.

|
|
Next you'll add three layout cells below the logo cell you just created. Later you'll insert the page's navigation buttons in these cells.
| 1 | In the Objects panel, click the Draw Layout Cell icon; then hold down the Control key (Windows) or Command key (Macintosh). |
| 2 | In the Document window, position the pointer below the cell you drew for the logo; then drag to draw a layout cell. |
Continue to hold the Control key (Windows) or Command key (Macintosh) and draw two more layout cells. Your screen should look similar to this.
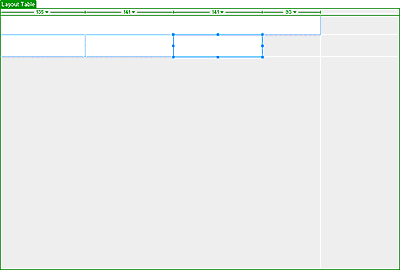
|
|
If you need to line up the cells next to each other you can resize and move the layout cells as you need. You change the size of a layout cell by using one of its resize handles.
You cannot click and drag a cell to move it to a new position. If you need to move a layout cell to reposition it in a document, follow these steps.
| 1 | Click the border of a layout cell to select it. |
| 2 | To move the layout cell, do one of the following: |
| Use the arrow keys. | |
| Hold down Shift and use the arrow keys to move a layout cell 5 pixels at a time. | |
Now you'll create a table of the navigation button cells you just created. Grouping the cells in a table enables you to control the cell spacing and to easily move the cells as a group if you want change the page layout. You'll create a table for the navigation buttons that is the same width as the logo cell above it.
Use Draw Layout Table to group the navigation button images.
| 1 | In the Objects panel, click the Draw Layout Table icon. |
| 2 | In the Document window, position the pointer at the top left corner of the first navigation button cell; then drag the pointer so the table contains the three cells and is the length of the logo cell.
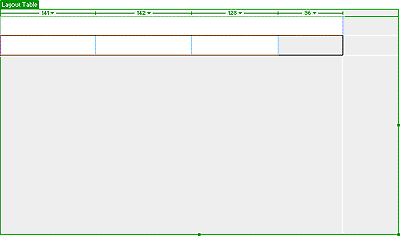
|
| 3 | Release the mouse to see the cells grouped in a new table.
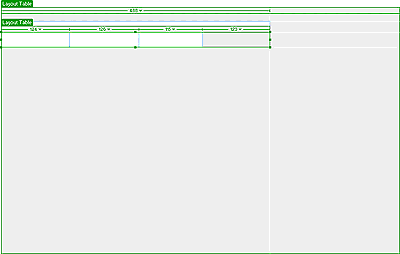
|
| You've created a table that contains three layout cells (the white area in the table) and an empty space (the gray area in the table). | |
You can select and move a layout table to other areas in a document. You cannot, however, move a layout table so that it overlaps another.
Next you'll move the table you just created a few pixels to the right to offset the alignment of the navigation buttons to the logo when they are inserted in the page.
| 1 | In the Document window click the tab on the Layout table to move it. |
| 2 | Drag the layout table a few pixels to the right to reposition it, then drag one of the table's right resize handles to align the right sides of the logo and navigation button layout cells. |
Notice that as you create new tables and cells, gridlines appear outlining the layout area. You can use these gridlines to align the layout elements.
Next add a layout cell for the Learn More About graphic.
| 1 | In the Objects panel, click the Draw Layout Cell icon. |
| 2 | In the Document window, draw a new cell in the space below the navigation button table. |
Your page should look similar to this:
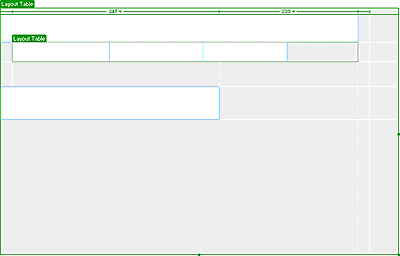
In the last section you used cells to create a table. Now, you'll start with a table and add cells.
| 1 | In the Objects panel, click the Draw Layout Table icon. |
| 2 | Move the pointer to the Document window. In the area below the layout cell you just added, drag the pointer to the right to align with the right side of the topmost cell; then drag down to the bottom of the Document window.
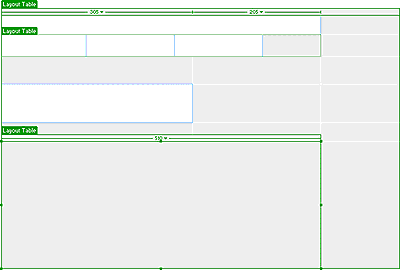
|
Now add layout cells into which you'll add text about travel locations.
| 1 | In the Objects panel, click the Draw Layout Cell icon and move the pointer to the layout table you just drew. |
| 2 | Draw a table cell approximately one-third the space in the table. |
| 3 | Click the border of the layout cell to select it; then in the Property inspector's Fixed field, type 170 to set the cells width. |
| 4 | Draw another table cell approximately one-third the space in the table next to the first cell. |
| 5 | Click the border of the layout cell to select it; then in the Property inspector's Fixed field, type 170 to set the cells width. |
| 6 | Draw the last table cell in the remaining space in the table. Resize or move the cells to adjust the size or position of the cells as needed. |
Your screen should look similar to this:
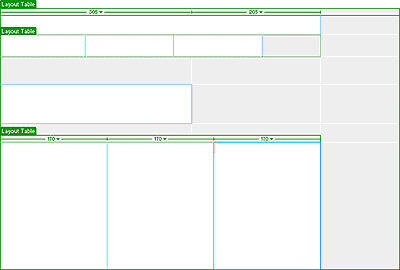
|
|
![]()